Overview
As we continuously release more and better finders and fixers, some might require a newer version of the CloudFix CloudFormation template to run. To make sure you can take advantage of all the available opportunities to save in your AWS bill, please check regularly that you are running the most up-to-date template.
Solution
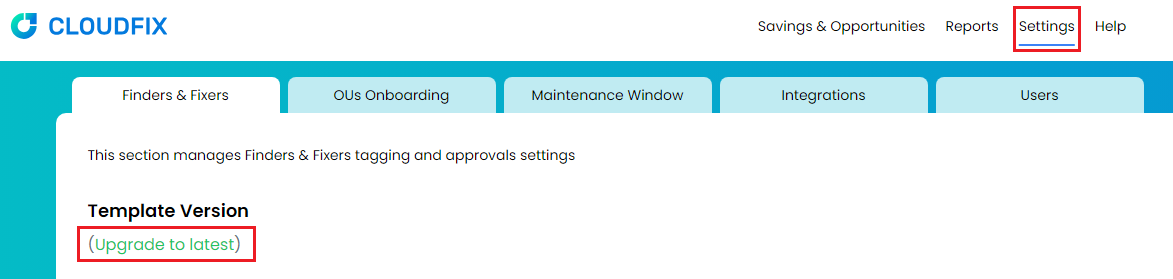
1. You can check your current version as well as see if there are updates available by logging into CloudFix and going to the Settings tab:
2. On another tab in the same window, sign in to your AWS Console on the management account using the following AWS link: https://signin.aws.amazon.com
3. If any upgrade is available, you will see the Upgrade to latest link. Clicking it will bring up the below dialog:

Please note that if the update is a major version upgrade (for example, going from 3.x to 4.x), CloudFix automatically displays a message recommending a stack deletion and replacement, rather than an in place update, along with buttons to go to your existing stack (to delete it) and to create the new stack. This is not always necessary, please check with your CloudFix customer success contact in each case.
4. Clicking the Upgrade stacks button will automatically copy the CloudFormation template link to your clipboard (using which you can download the cloudfix-onboarding.yaml file — for reference, you can paste it in your browser to download this file) and open the AWS console in a new tab, where the CloudFix related CloudFormation stack CloudFix-prod is deployed.
Note: If you originally deployed CloudFix via AWS Marketplace Quick Launch, you may see a warning about updating a nested stack directly. This is expected — please accept and proceed with the update.
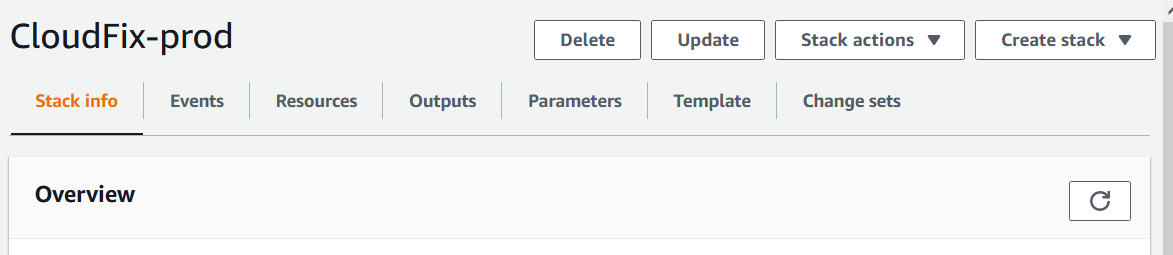
5. Select CloudFix-prod stack from the list and click the Update button:
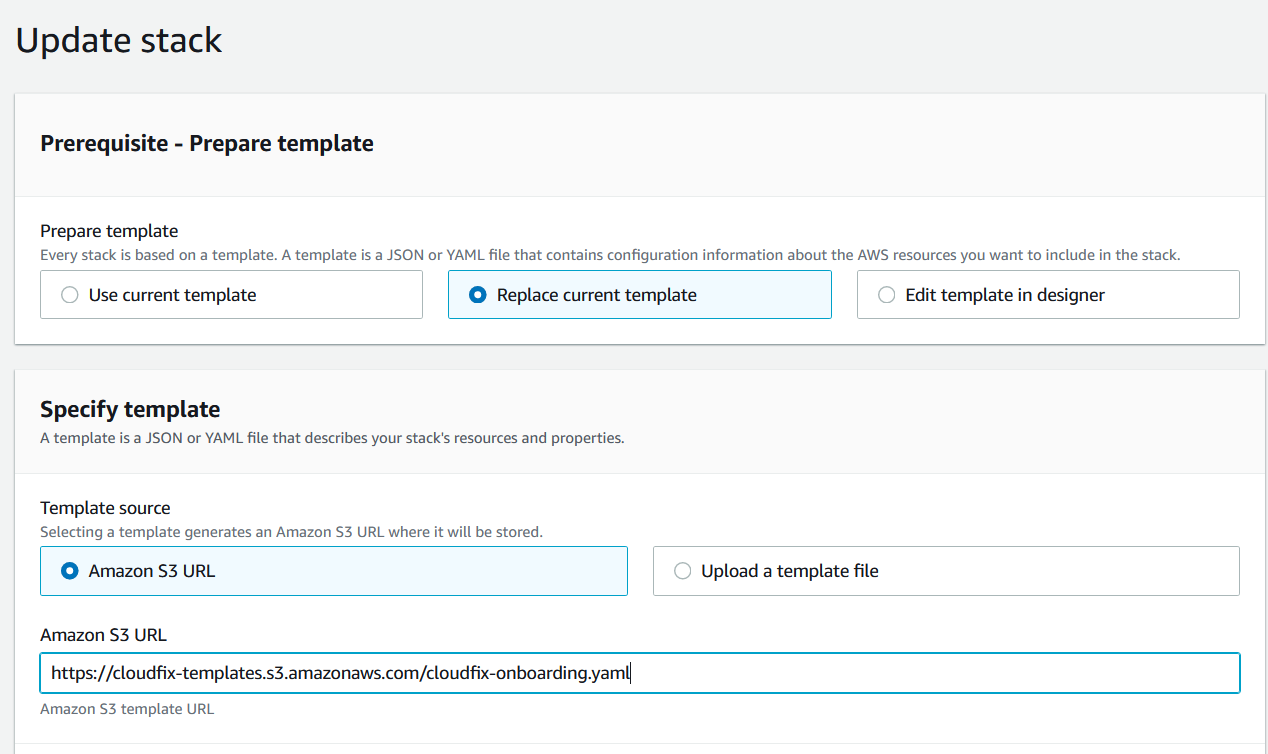
6. Select Make a direct update, then select Replace current template.
7. Provide Amazon S3 URL as the one that was copied automatically in step 4 using the Upgrade stacks button:
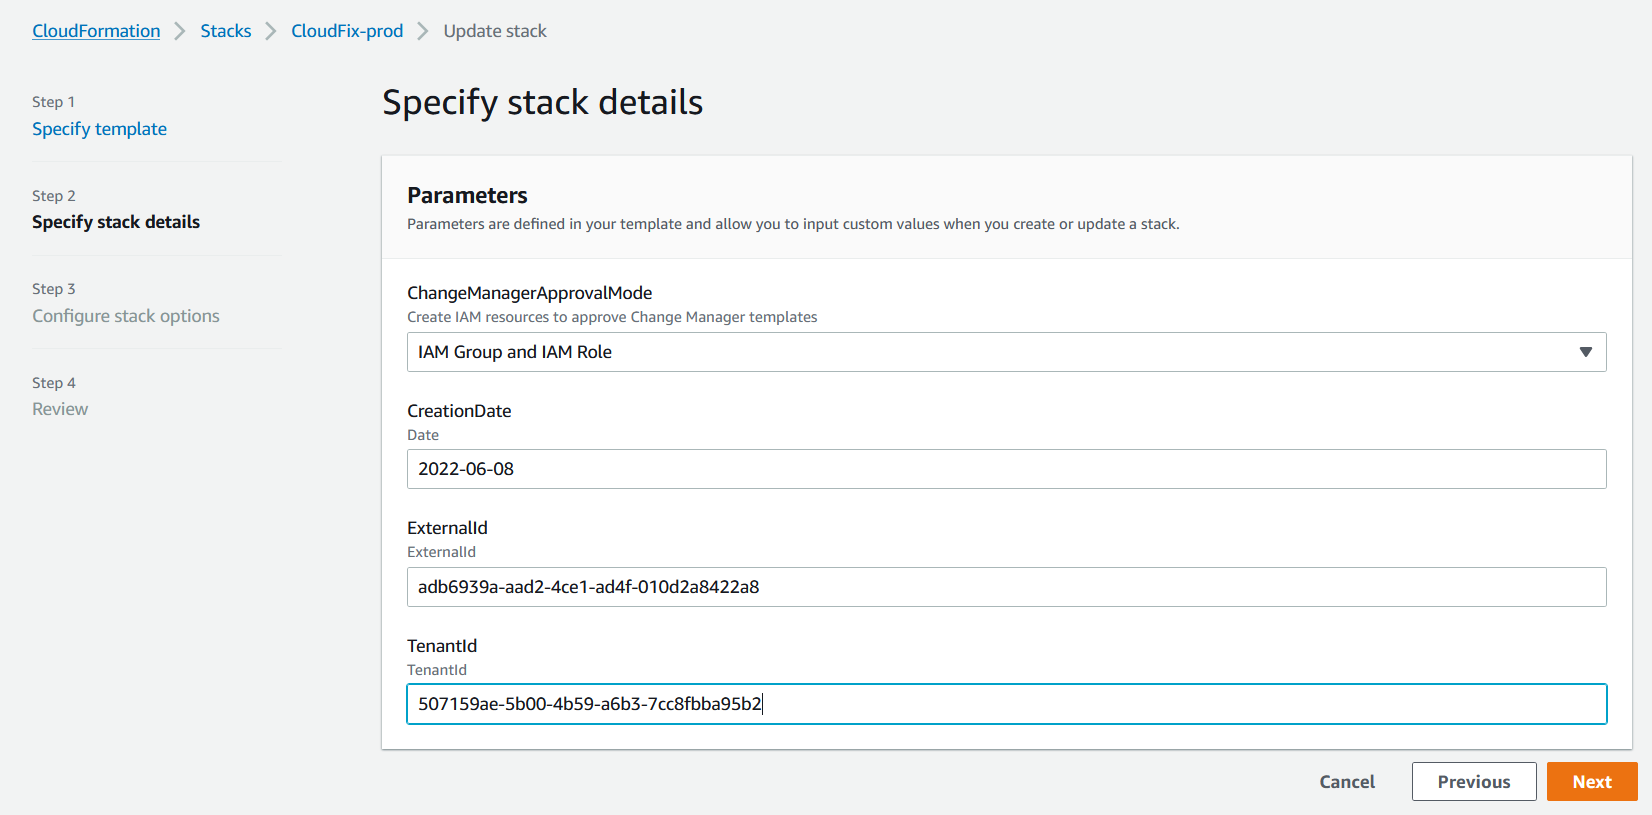
8. Click Next. Do not modify the parameters and click Next:
9. Do not modify the parameters and click Next on Step 3 - Configure stack options
10. The last Review step on the CloudFormation console will be visible as:
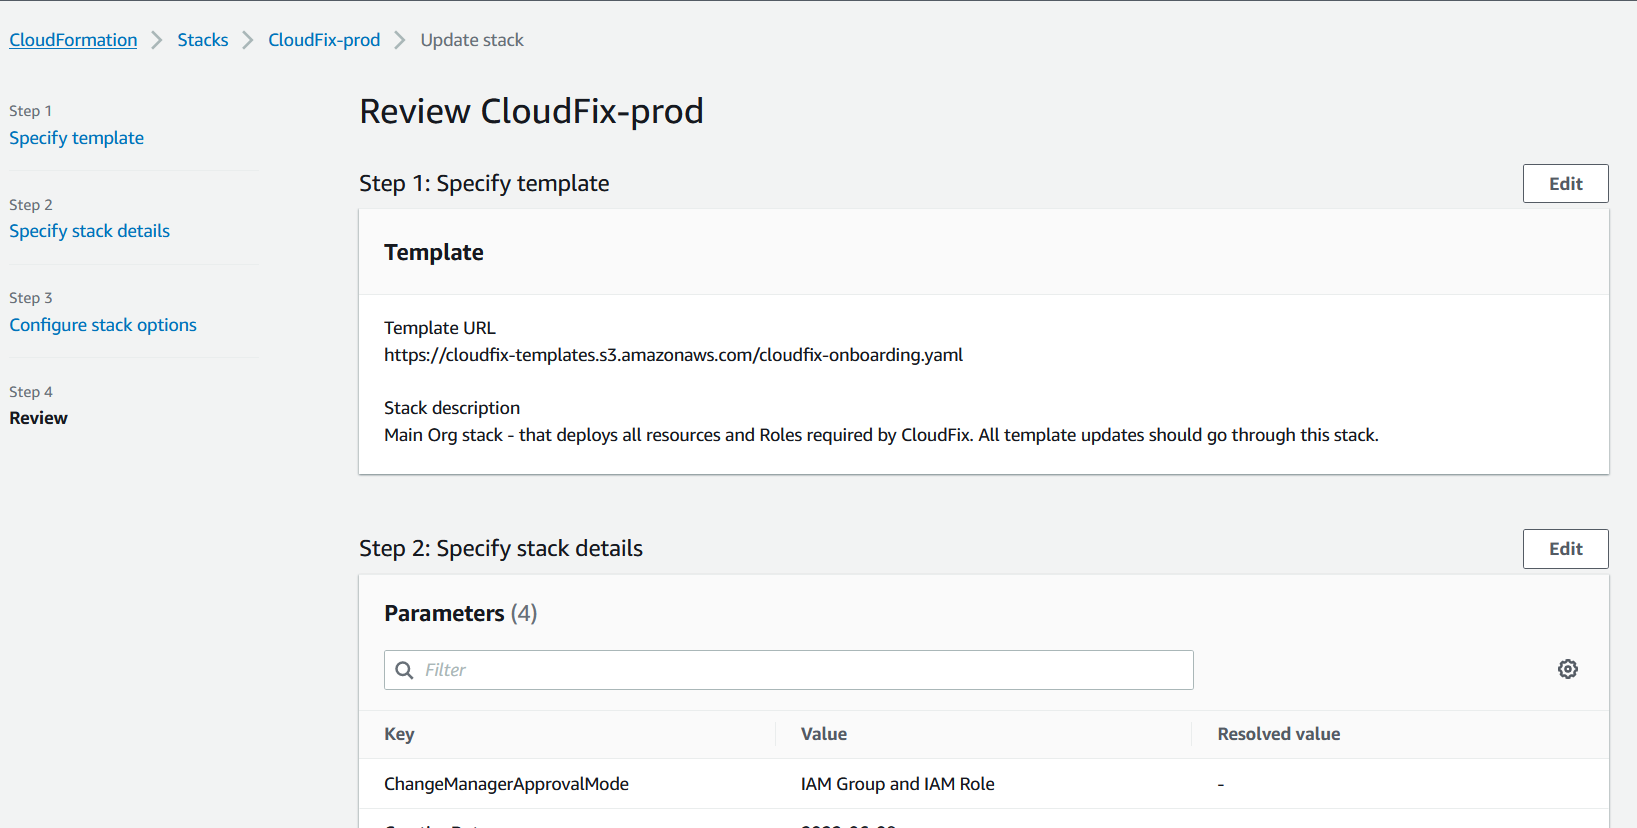
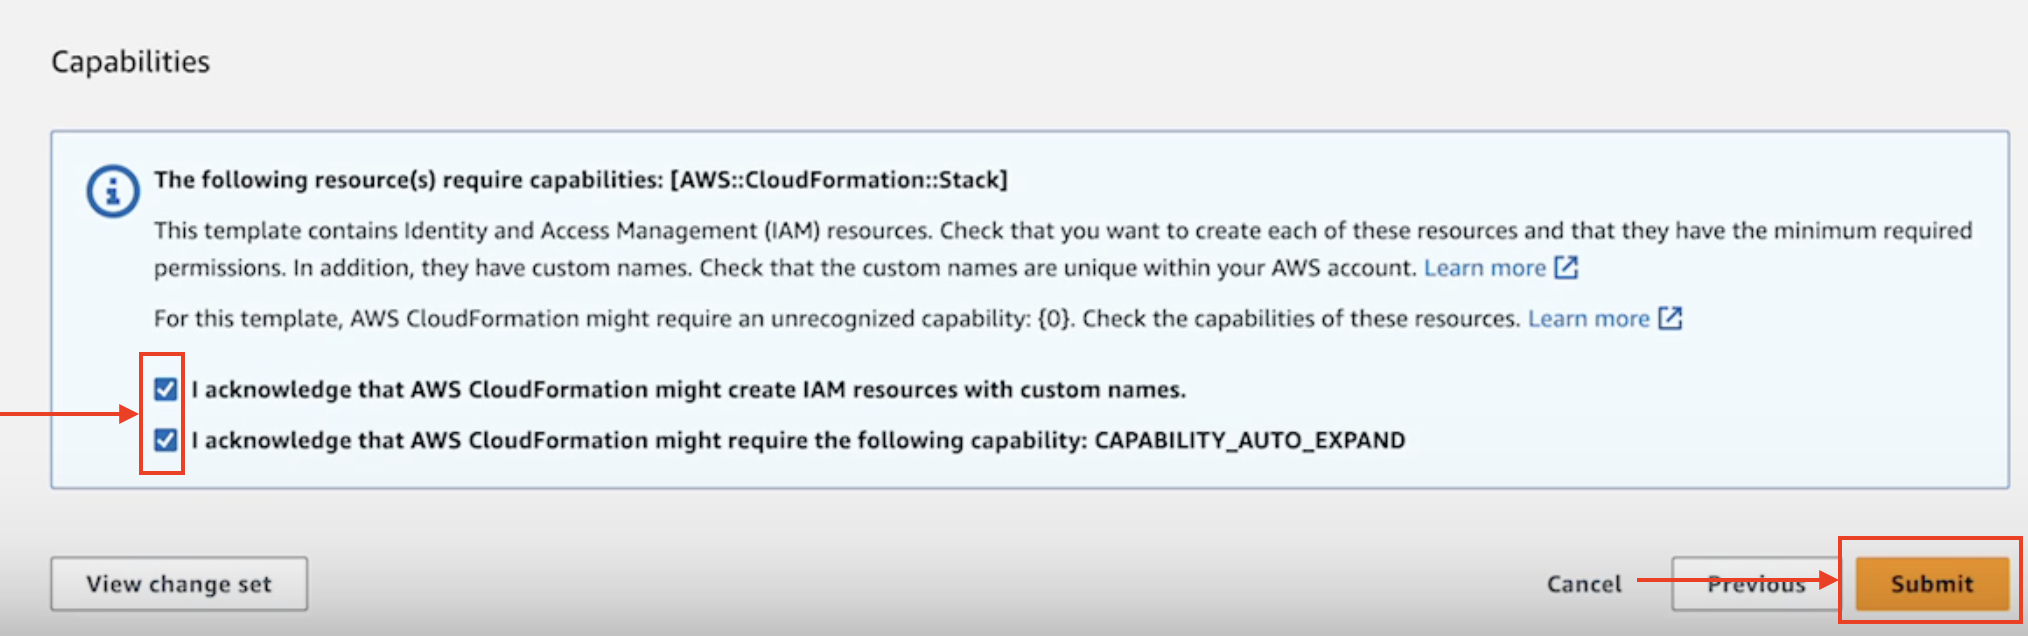
11. Scroll down the page and check the boxes for both:
I acknowledge that AWS CloudFormation might create IAM resources with custom names.andI acknowledge that AWS CloudFormation might require the following capability: CAPABILITY_AUTO_EXPAND
13. Click Submit.
CloudFormation console will display the CloudFix stack and will show the status as UPDATE_IN_PROGRESS until all stacks are updated. This can take a few minutes. You can use the refresh button on the Events tab under CloudFormation > Stacks > CloudFix-prod to check the status of the upgrade:
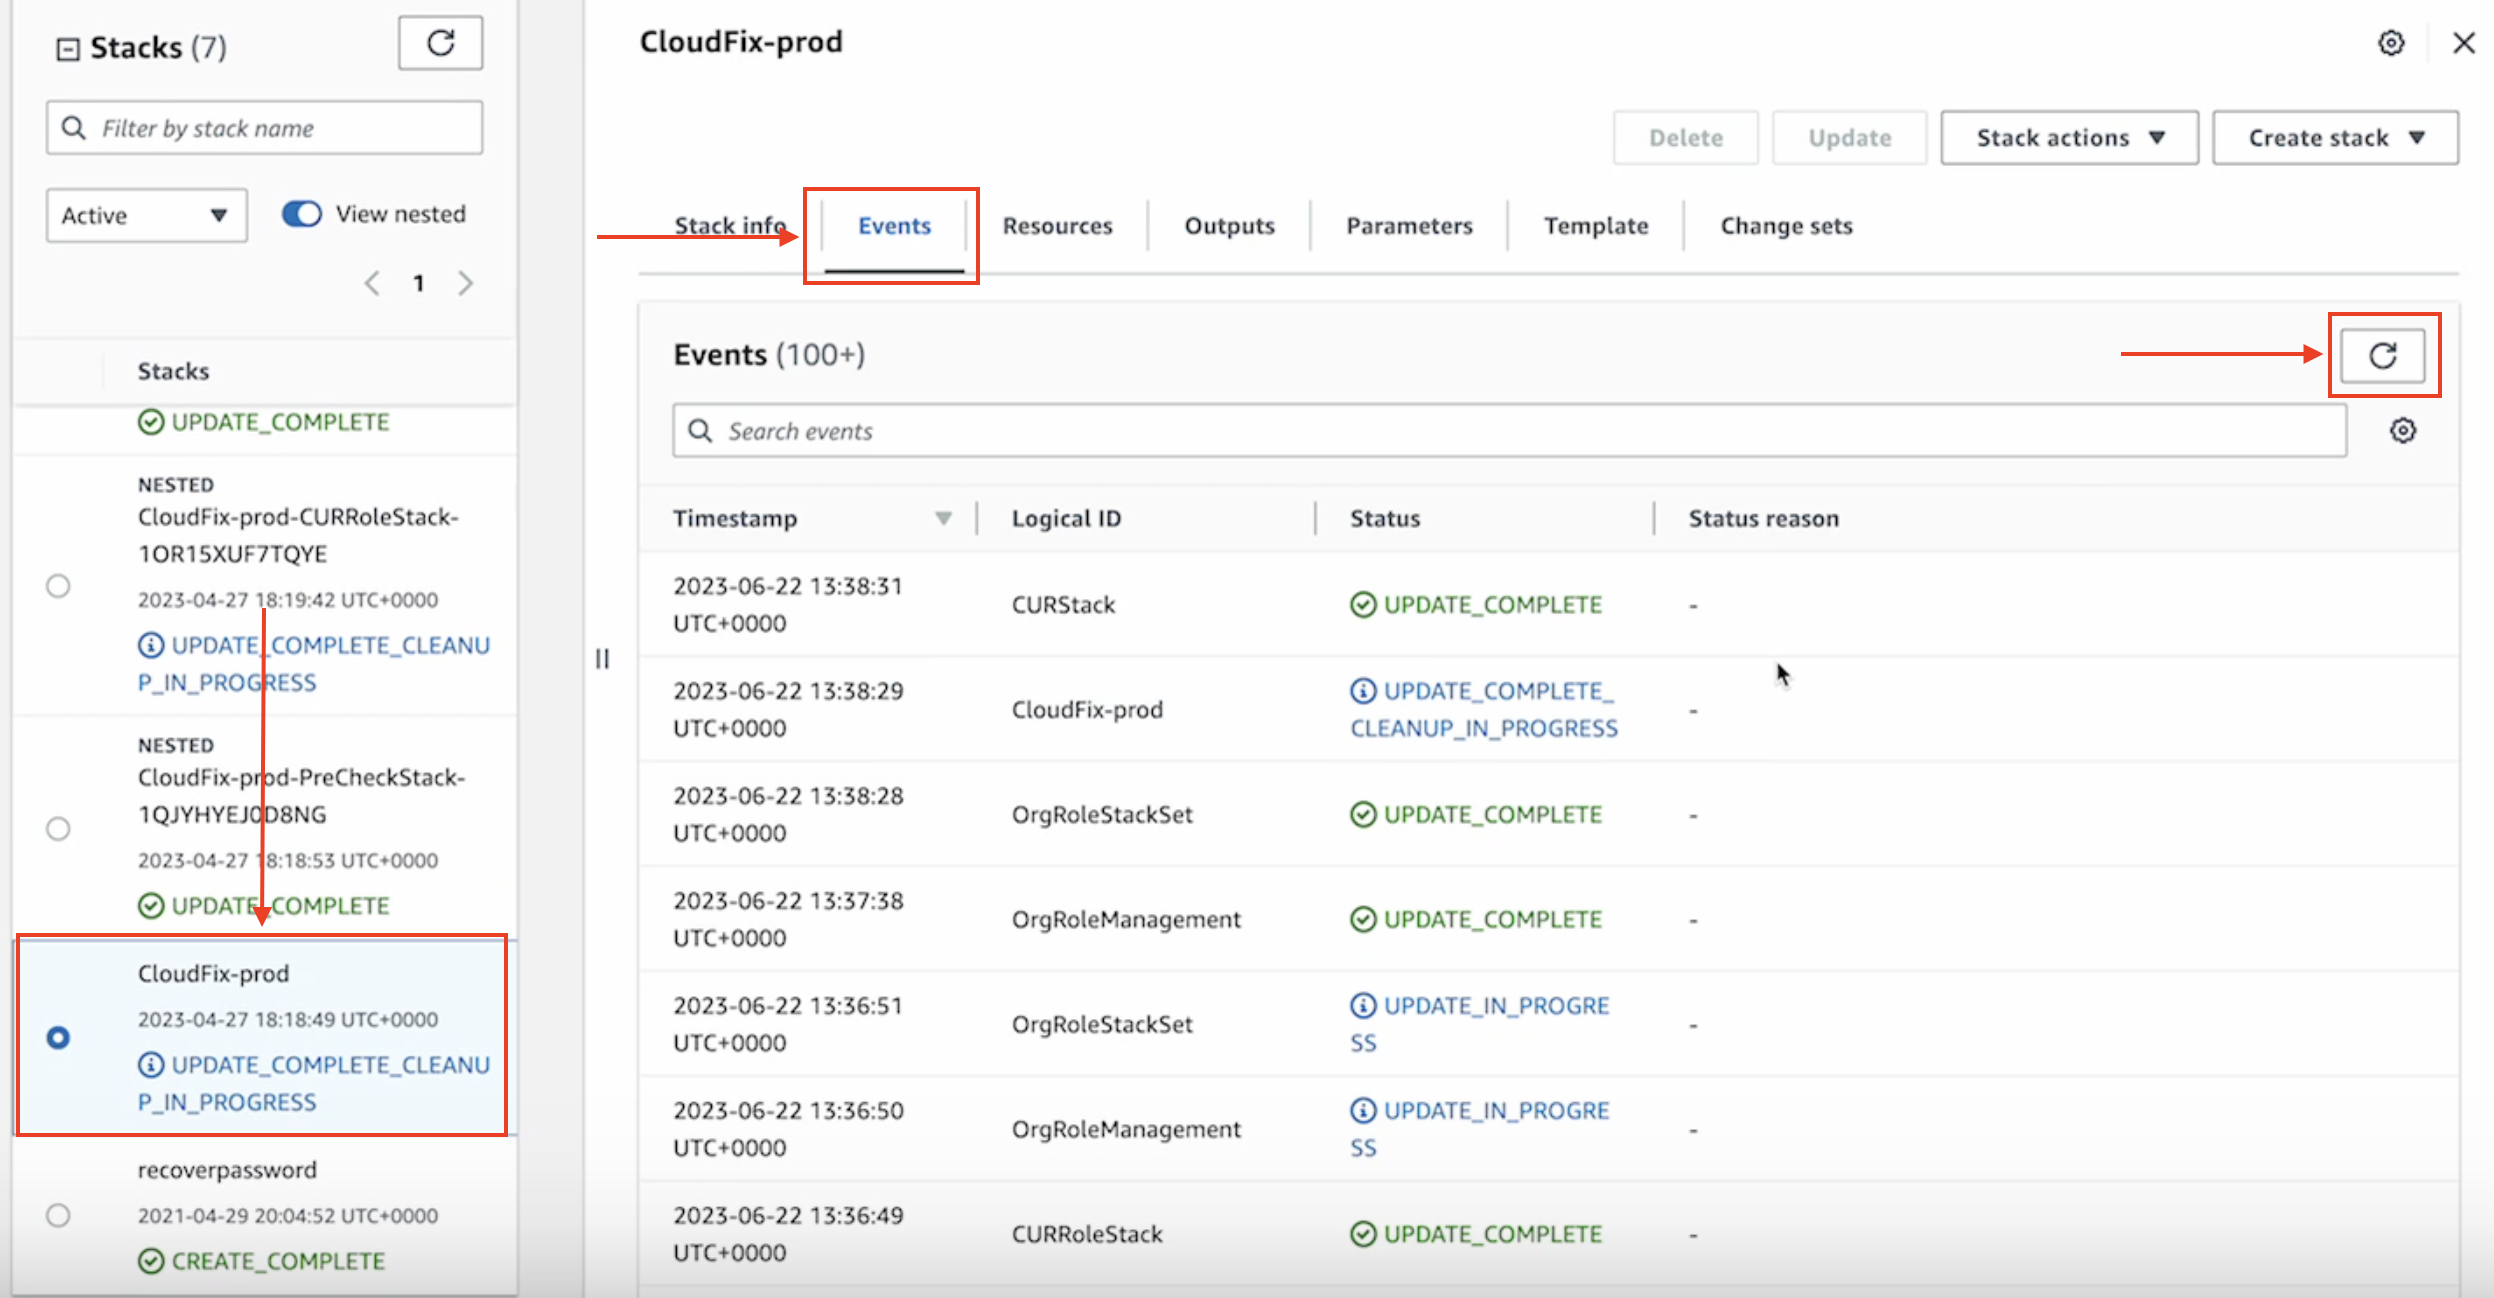
After this is completed, if you refresh the CloudFix's Overview page, the updated version will be seen and the upgrade to latest link will no longer be seen.
Priyanka Bhotika
Comments